Installation
To install the library and actually use it, you’ve got two choices:
Easy way : Require the library and autoload it using Composer. This also make the updates way more easier and version.
Manual way : Download the library from github and import the files from /src to a PHPOnCouch folder in your project. You will need to update manually.
Version
Before we get into the installation, you need to know that multiple versions are available at the moment. Since it’s forked project, you have always access to the origin branches. For the future, here are the description of the available versions :
dev-master : The lastest tested sources
2.x.x : The PHP-on-Couch 2.0 Releases (Will be installed by default) This is the latest version that supports CouchDB 2.x.x
1.6.1.x-dev : The PHP-on-Couch 1.6.1 production branch. This branch contains the latest developments supporting CouchDB 1.6.1.
From this information, it is up to you to choose the right version. By default, the latest release will be installed.
Composer installation
Once you have composer installed, you are very close to have PHP-on-Couch installed. You simply need to do :
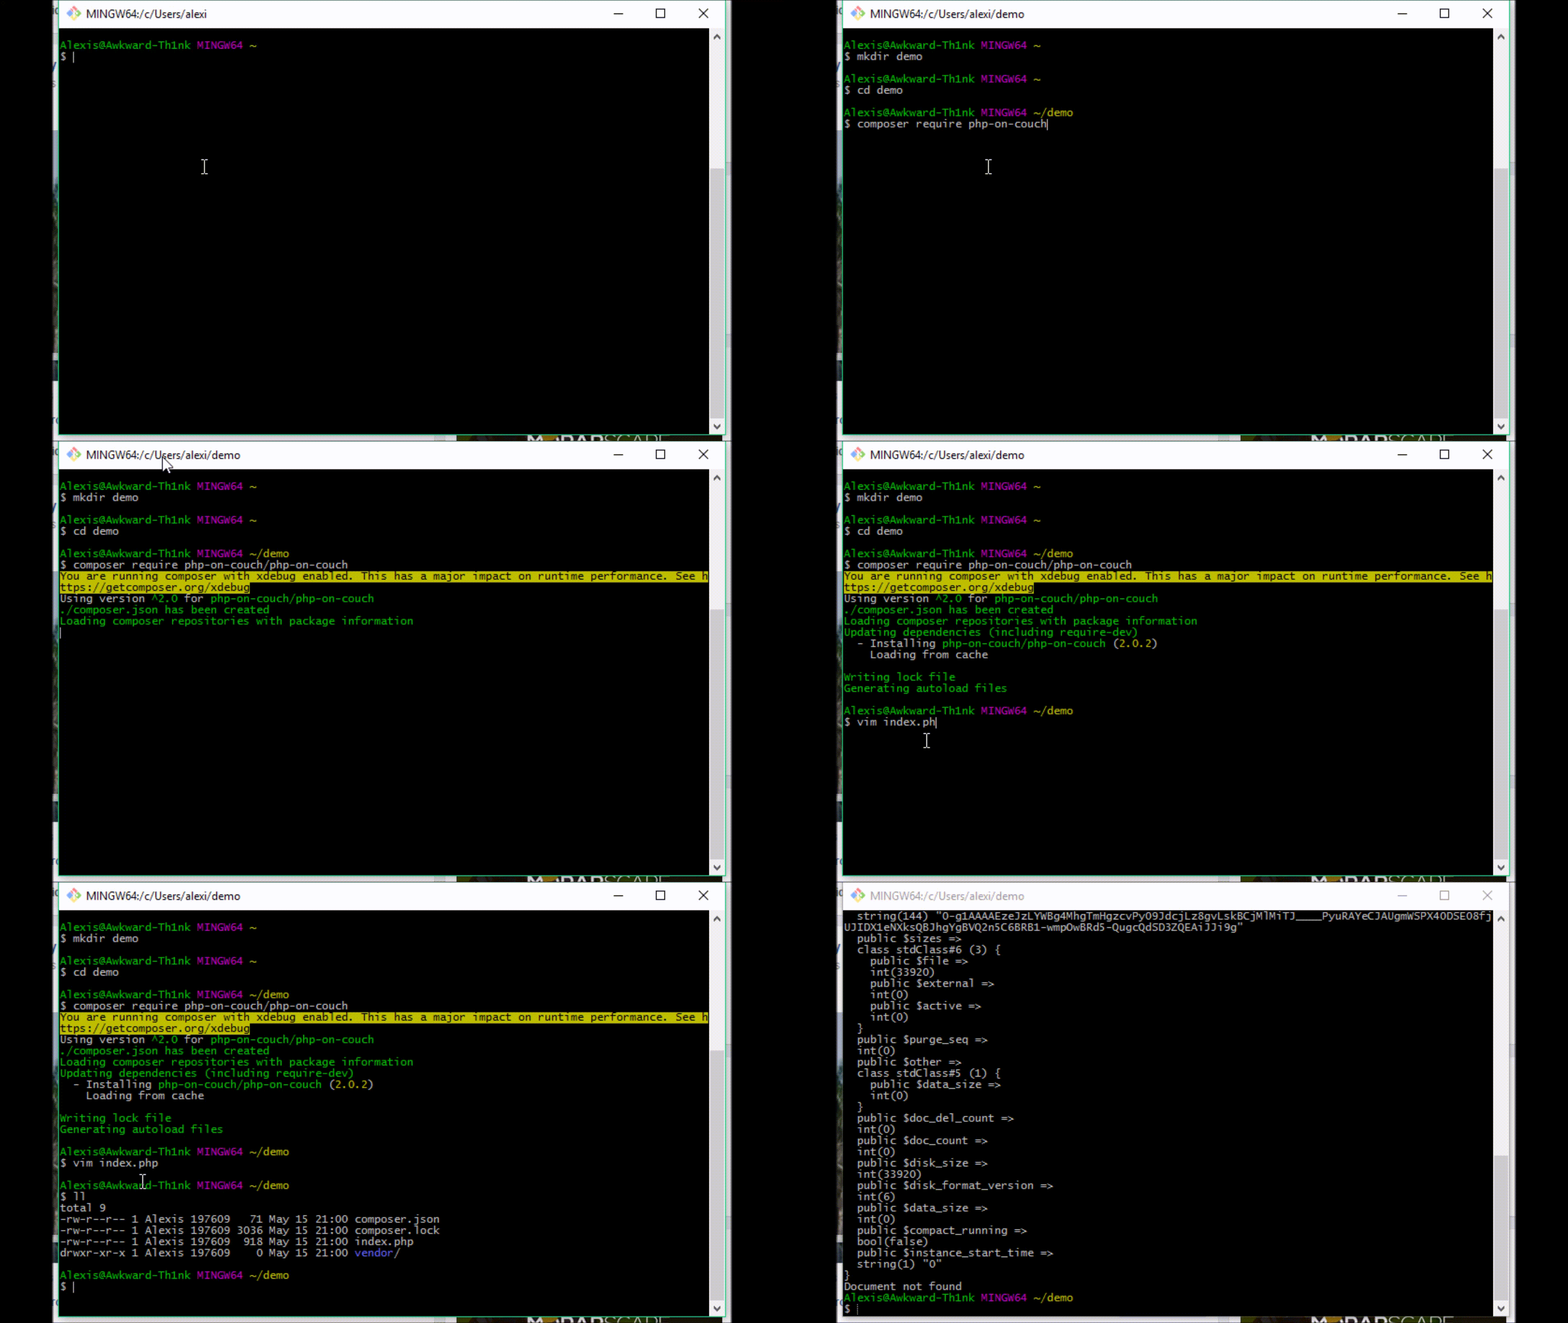
Add the root of your project, in a command shell, execute the following command : composer require php-on-couch/php-on-couch.
Note
By default, it will take the latest release*
Make sure your composer autoloader is called. If not, simply require the Autoload.php file in vendor folder.
Start playing with PHPOnCouch!
Composer demo

The content pasted into the index.php file is :
<?php

//We need to use an autoloader to import PHPOnCouch classes
//I will use composer's autoloader for this demo
$autoloader = join(DIRECTORY_SEPARATOR,[__DIR__,'vendor','Autoload.php']);
require $autoloader;

//We import the classes that we need
use PHPOnCouch\CouchClient;
use PHPOnCouch\Exceptions;

//We create a client to access the database
$client = new CouchClient('http://admin:admin@localhost:5984','dbname');

//We create the database if required
if(!$client->databaseExists()){
    $client->createDatabase();
}

//We get the database info just for the demo
var_dump($client->getDatabaseInfos());

//Note:  Every request should be inside a try catch since CouchExceptions could be thrown.For example, let's try to get a unexisting document

try{
    $client->getDoc('the id');
    echo 'Document found';
}
catch(Exceptions\CouchNotFoundException $ex){
    if($ex->getCode() == 404)
        echo 'Document not found';
}
Manual installation
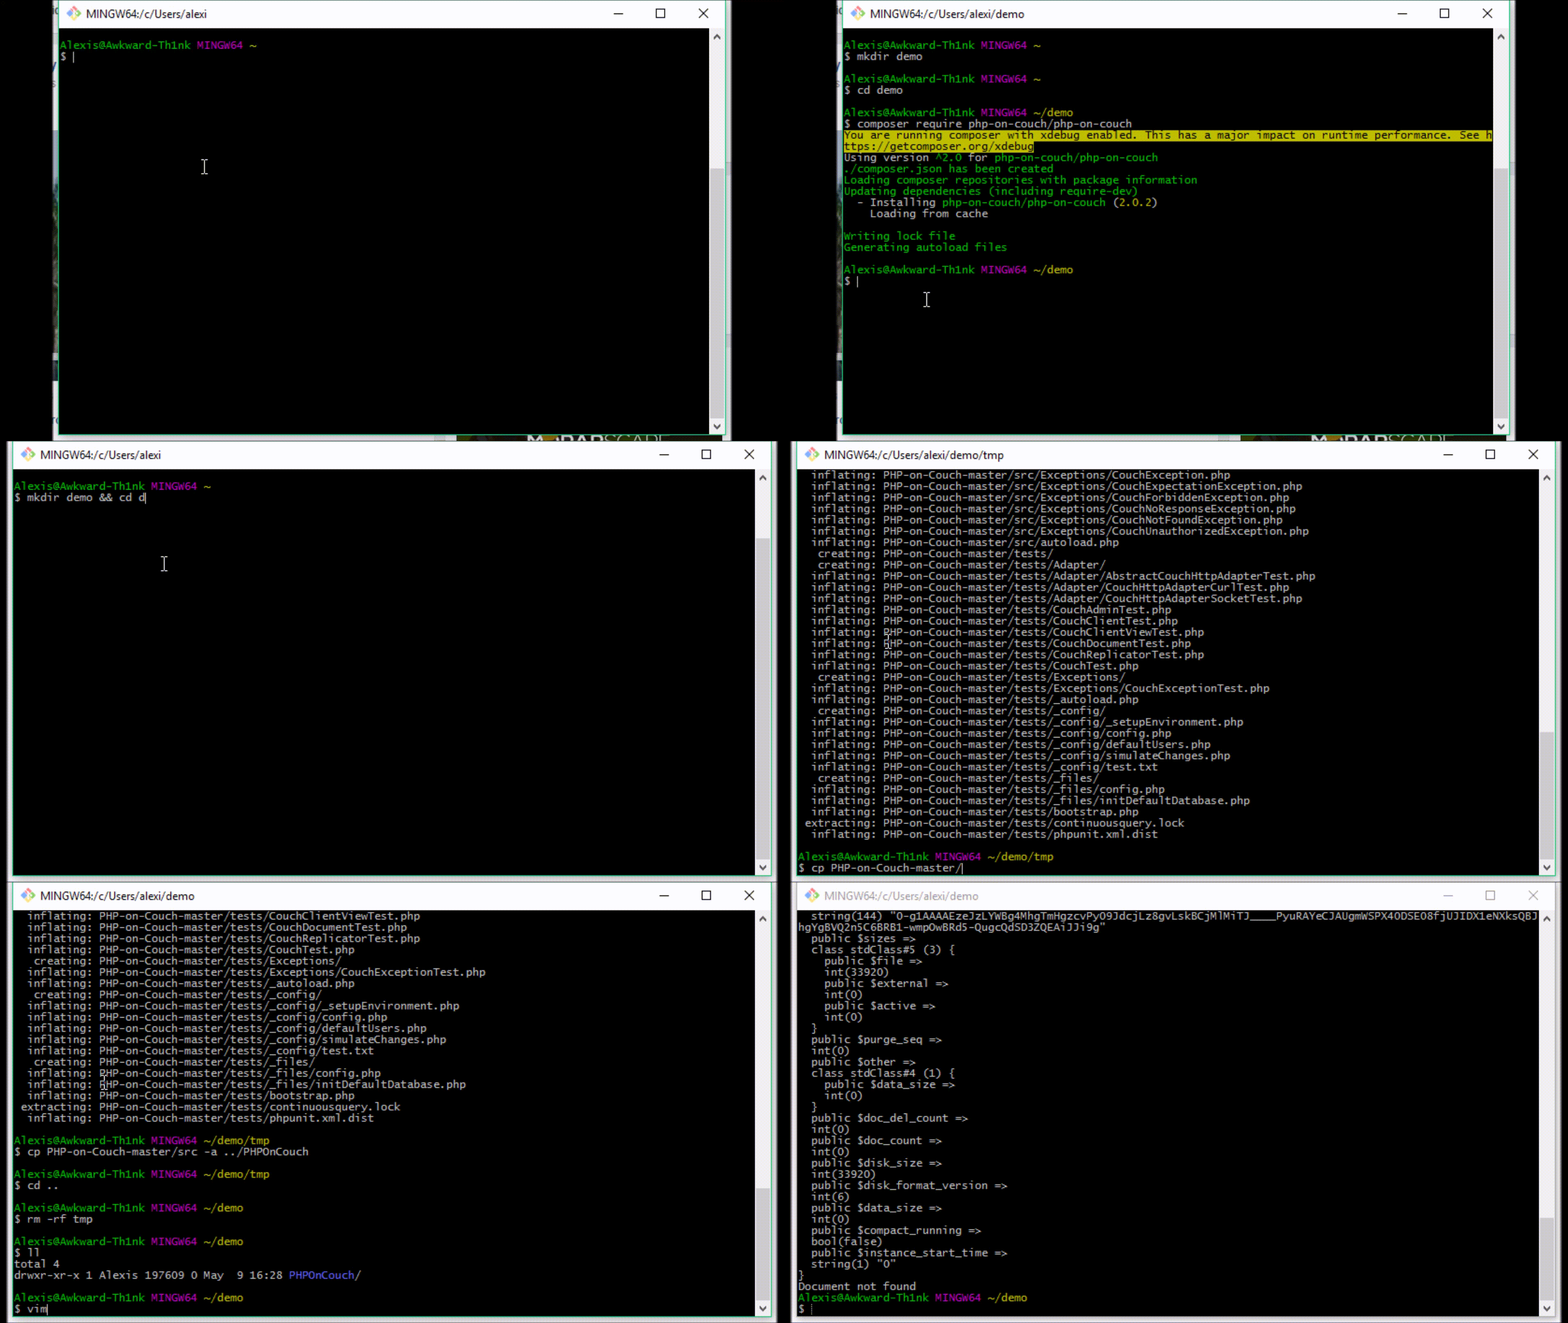
Since you have chose the manual installation, it’s a bit more complicated but still simple! As you are probably reading this, you should be on Github. First of all, you need to select the branch that you want to install.
Once you’re on this branch, click the Click or download button and Download ZIP.
Within the ZIP, extract the src folder into a folder named PHPOnCouch somewhere in your project.
The only remaning step is to require the files. You can either use your own autloader or simply require the files manually.
Manual demo

index.php file content :
<?php

//We need to use an autoloader to import PHPOnCouch classes
//I will use PHPOnCouch autloader for the demo
$autoloader = join(DIRECTORY_SEPARATOR,[__DIR__,'PHPOnCouch','Autoload.php']);
require $autoloader;

//We import the classes that we need
use PHPOnCouch\CouchClient;
use PHPOnCouch\Exceptions;

//We create a client to access the database
$client = new CouchClient('http://admin:admin@localhost:5984','dbname');

//We create the database if required
if(!$client->databaseExists()){
    $client->createDatabase();
}

//We get the database info just for the demo
var_dump($client->getDatabaseInfos());

//Note:  Every request should be inside a try catch since CouchExceptions could be thrown.For example, let's try to get a unexisting document

try{
    $client->getDoc('the id');
    echo 'Document found';
}
catch(Exceptions\CouchNotFoundException $ex){
    if($ex->getCode() == 404)
        echo 'Document not found';
}
And there you go! You can use the library from there following the API